Step-by-step guides to get the most out of your RedVozTelecom services: your PBX, your Retail, your CallShop and your panel Reseller. Search above or pick a guide on the left.
PBX Client Guide — UC Panel
Your virtual phone system: extensions, voice menus (IVR), queues and reports.
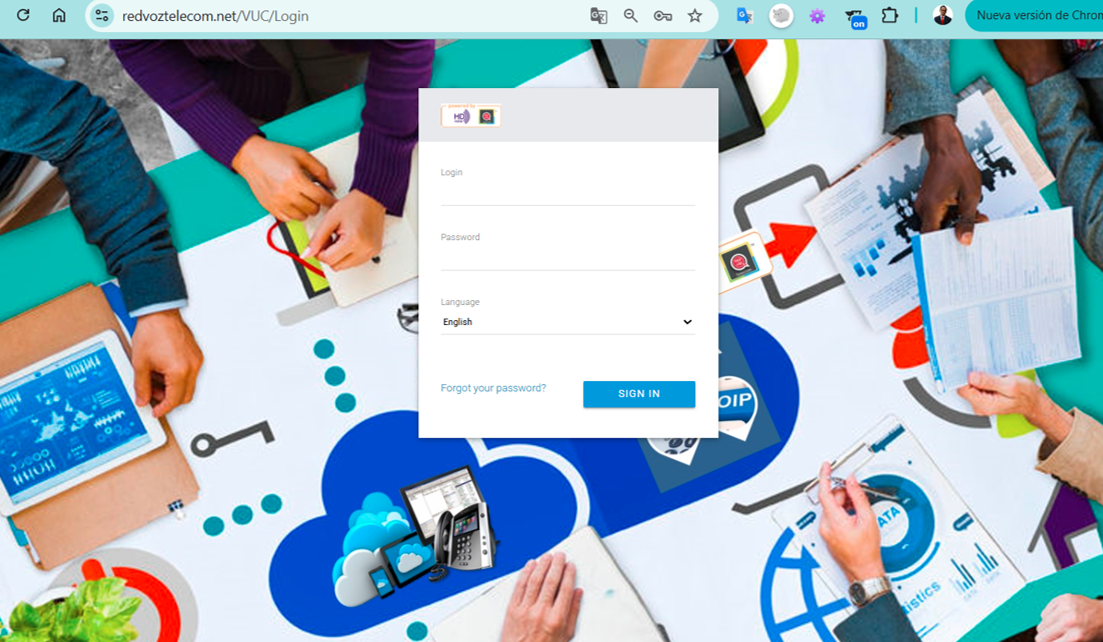
Go to redvoztelecom.net/uc/login, enter your username y password, and tap ACCESO. Forgot your password? Use "Forgot your password?" to recover it by email.
PBX Client login screen
2The dashboard and side menu
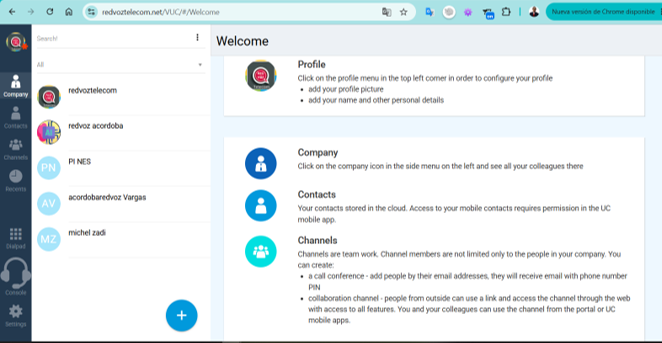
When you log in you'll see the menu bar on the left, and in the center your list of coworkers and contacts with a search box.
Section
What it's for
Company
See all your coworkers on the phone system
Contacts
Your address book stored in the cloud
Channels
Teamwork: conferences and collaboration rooms
Recents
History of your calls
Dialpad
Keypad to dial a direct number
Console
Operator view (live calls)
Settings
Configure the whole company (see section 4)
Welcome dashboard and side menu
3Your profile (My profile)
En My profile you set your details and how your extension behaves. What you can adjust:
Login, Nombre y Apellido — how your coworkers identify you.
Cell phone (Mobile phone) y Email — contact and to receive notifications.
Foto, Ciudad, País y Zona horaria — your profile and the correct time in your records.
Cambiar password (Change password) — for security.
Caller ID — the number you show when calling. Branch — your branch. Extension numbers — your extension(s), e.g. 101.
VoIP devices — the phones/softphones registered on your extension (with their MAC and status).
Ringback timeout — how many seconds it rings before going to voicemail (e.g. 20).
Voicemail to email — turn this on so voicemails reach your email. ✅
My profile — your extension's details and settings
3.1Your phone / softphone (SIP registration)
To make and receive calls you need a phone: it can be an physical IP phone or a softphone (an app on your computer or phone, like Zoiper). You "register" it with the SIP of your extension:
User / Login — the one from your extension (e.g. username100).
SIP Password — the password we sent you when your account was activated, or the one you generate yourself in your user panel (Retail Client or PBX Client). It's not the extension number.
Server / Domain — the RedVozTelecom host we give you.
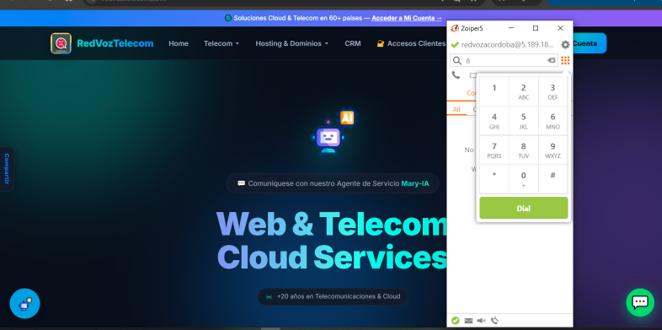
When the softphone shows the green dot (registered), you can dial from its keypad. In the image, Zoiper appears registered and ready to call.
📱 Take your extension in your pocket. You can call from your phone or PC with free apps:
Zoiper — Android, iPhone/iPad, Windows, Mac and Linux.
MizuPhone — Android and iOS.
MicroSIP — Windows.
You download the app, ask us for your SIP details (username, server and password), enter them and you're calling from anywhere with internet. 👉 Apps and guides at redvoztelecom.com/app-para-llamadas.
Not registering? Check username, password and server; if you still have no line, write to us and we'll look into it.
Zoiper softphone registered (green dot = ready to call)
4Company settings
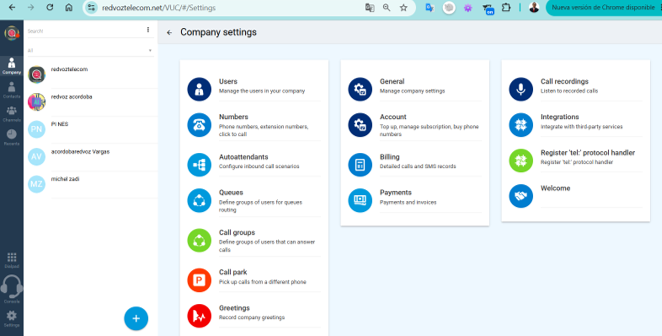
This is the heart of your phone system. When you go to Settings you see these cards:
People and call routing
Usuarios (Users) — Add and manage your company's members (each employee = one user/extension).
Números (Numbers) — Your phone numbers, extension numbers and the "click to call" feature.
Auto-attendants — The entry menu: "Press 1 for Sales, 2 for Support…" (your IVR).
Queues — They distribute waiting calls among several agents (ideal for support/sales).
Call groups — Several phones ring together; the first to answer takes the call.
Call park — Put a call on hold and pick it up from another phone.
Greetings — Record the company's welcome messages.
Account and administration
General — General company settings.
Account — Top up balance, manage subscription and buy new numbers.
Handler for the tel: protocol — To dial from the panel when you click a number on your PC.
Company settings
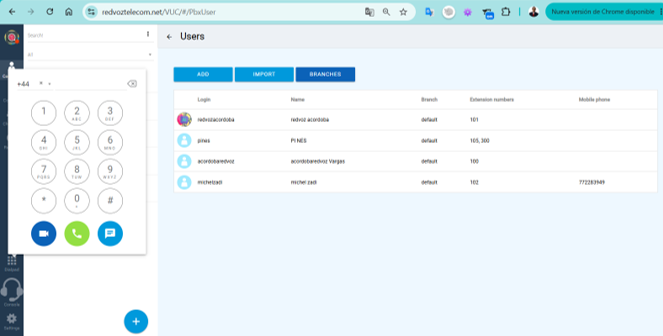
4.1Users — step by step
En Settings → Usuarios you see the table with all the members of your phone system. Each row is a user/extension:
Column
What it is
Login
The name used to log in (e.g. pines)
Name
Real name that's displayed
Branch
The branch/group (default default)
Extension numbers
Internal extension number(s) — e.g. 101, or several like 105, 300
Mobile phone
Optional cell phone for forwarding
Buttons at the top:
ADD — Create a new user: fill in Login, Name, assign a free extension, password and (optional) their cell phone for forwarding. Save and the extension is ready to register a phone or softphone.
IMPORT — Load several users at once from a file (ideal when setting up a company with many extensions).
BRANCHES — Organize users by location (by default they all go in default).
Para edit, click the user's row and change their details, extension, password or forwarding.
Tip: an extension with two numbers (like 105, 300) lets that person receive calls on both, or separate internal/direct.
List of users and extensions
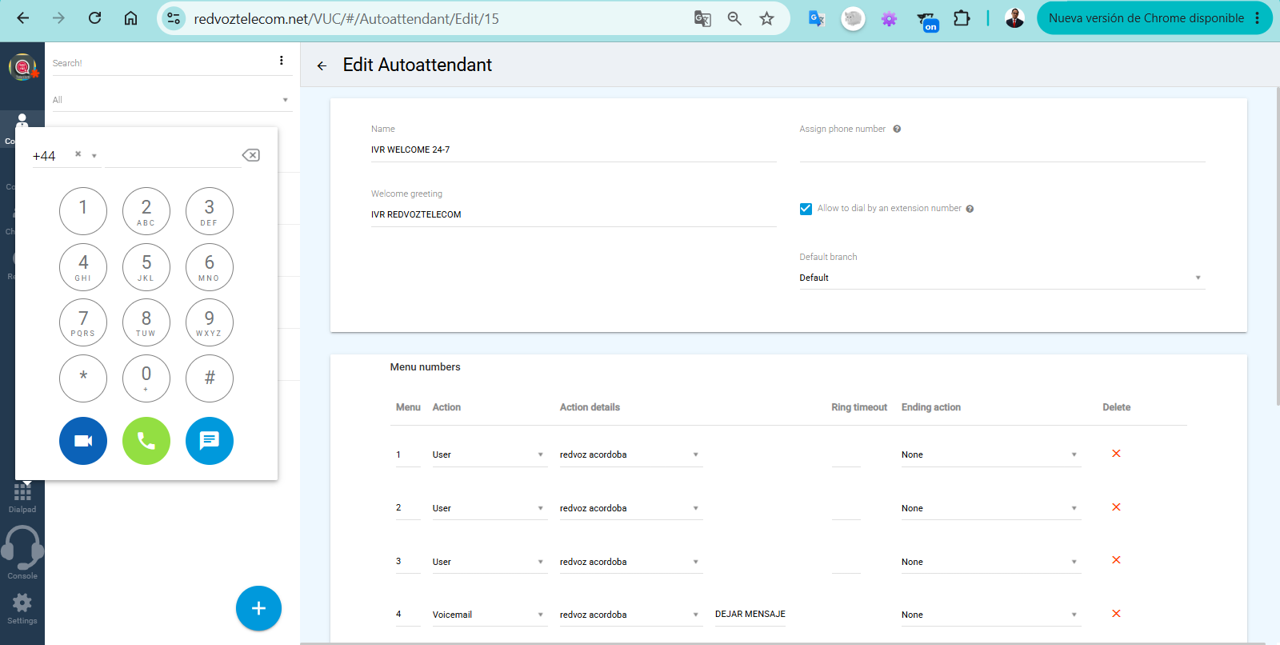
4.2Auto-attendant (IVR)
En Settings → Autoattendants is the list of your voice menus (the "press 1 for…"). Each is a named incoming scenario.
How it works:
ADD — Create a new menu: give it a name, choose the greeting that plays (from Greetings) and define where each key sends the call: 1 → Sales, 2 → Support, 0 → operator, etc.
Trash — Delete the scenario you no longer use.
Para edit, click its name and adjust the greeting, the keypad options and the destinations (extension, queue, group or voicemail).
The typical flow of an incoming call:
Call comes in → Greeting (Greetings) → IVR (Autoattendant)
→ 1 = Sales queue
→ 2 = Support queue
→ 0 = Operator / Call group
→ after hours = "Number out of service"
Your auto-attendants (IVR)
4.2.1Advanced IVR: by schedule, by number and nested menus
The voice menu does much more than "press 1 or 2". You can build powerful scenarios:
By schedule (time conditions) — Have the IVR respond differently depending on day and time. E.g.: during office hours it goes to the normal menu; after hours, holidays or lunch, it sends straight to voicemail or a "we're closed" greeting.
By dialed number (DID) — Each public number can land on a different IVR. E.g.: the Ventas number goes to one menu and the Soporte to another.
Destinations for each key — An option can lead to an extension, a ring group, a queue, a voicemail or even to another IVR (menus within menus).
Greetings with text-to-speech — If you don't want to record, the system reads your text with an automatic voice (available in Spanish, English and other languages).
Real example: Monday to Friday 8am–6pm → menu "1 Sales / 2 Support"; outside that range → "business hours" greeting and to voicemail. All automatic, without anyone lifting a finger.
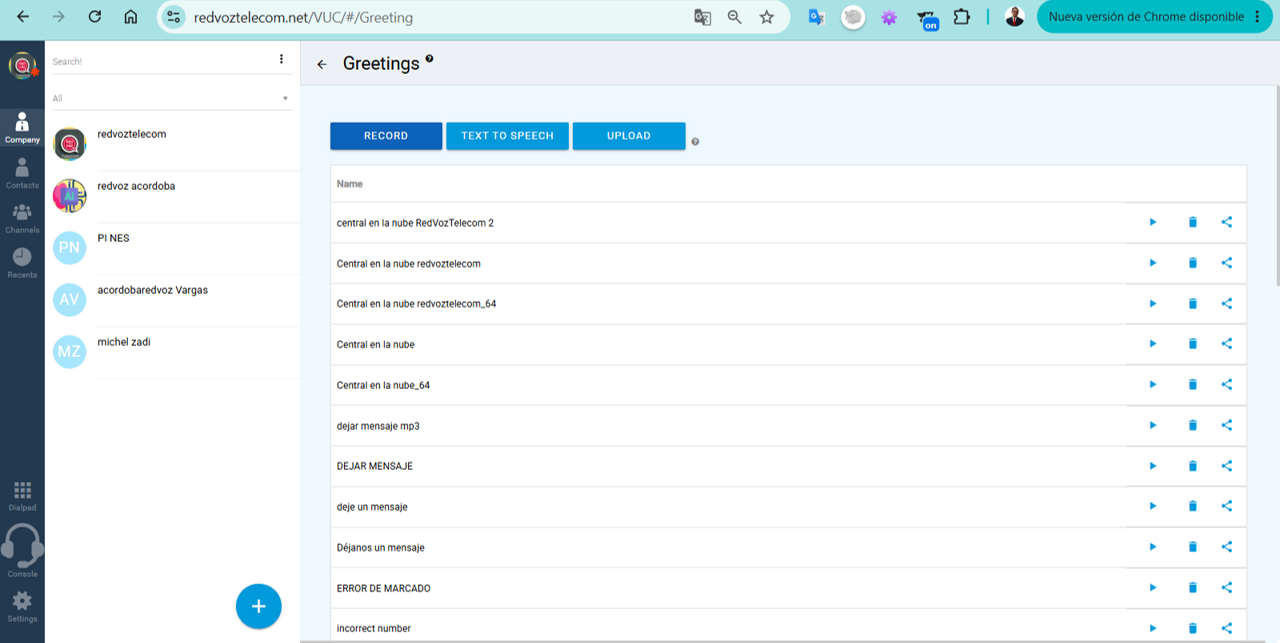
4.3Greetings
En Settings → Greetings you store the voice messages of the company (those heard in the IVR, voicemail or after hours). You have three ways to create them:
RECORD — Record the greeting with your microphone right there.
TEXT TO SPEECH — Type the text and the system turns it into audio with an automatic voice.
UPLOAD — Upload an audio file (mp3) you've already recorded.
Each greeting in the list has buttons to play (▶), delete (🗑) y share. Then you assign it to an IVR or voicemail.
Voice greetings (Greetings) — record, text-to-speech or upload mp3
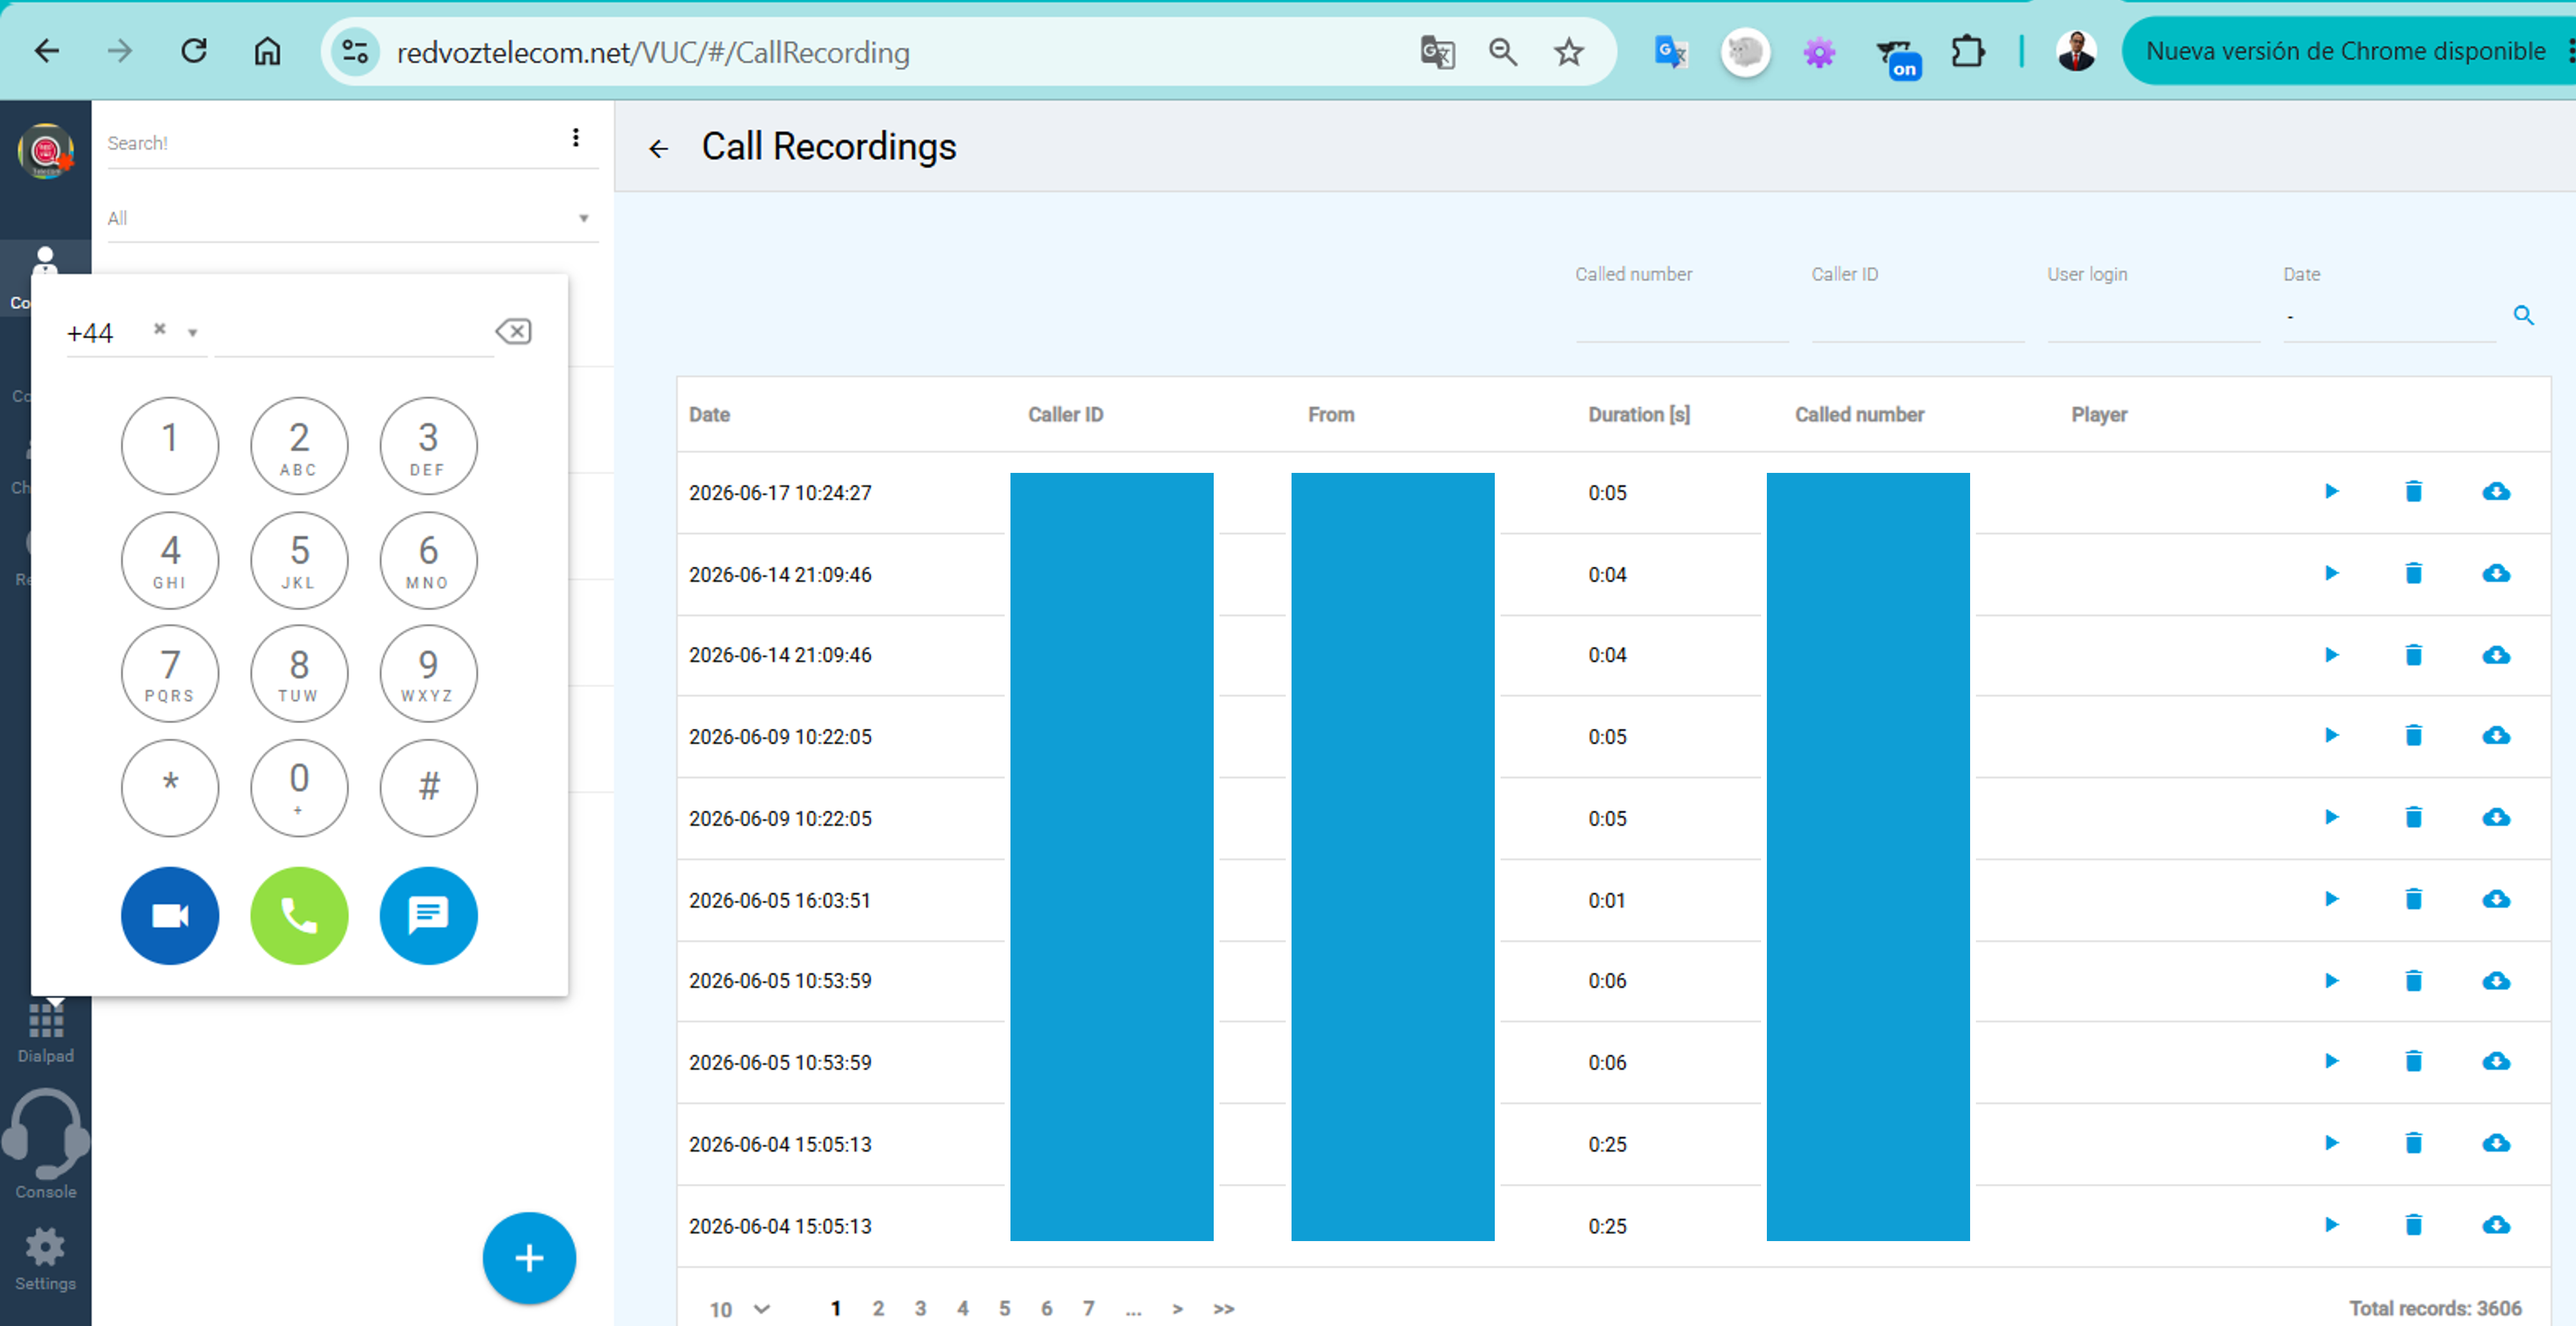
4.4Call recordings
En Settings → Call recordingsyou find the history of recorded calls. The table shows Date, Caller ID, From/To, Duration and the dialed number. In each row you can:
▶ Play — Listen to the recording in the browser.
⬇ Download — Save the audio to your computer.
🗑 Delete — Delete the recording.
You can filter by number, Caller ID, user or date to find a specific call.
Call recordings — play, download or delete
5Channels — teamwork
Channels aren't limited to your company. You can create:
Phone conference — You add people by email; they get a number and PIN to join.
Collaboration channel — Outside people join with a link and use the channel from the web, with all features. You and your team manage it from the portal or the UC mobile app.
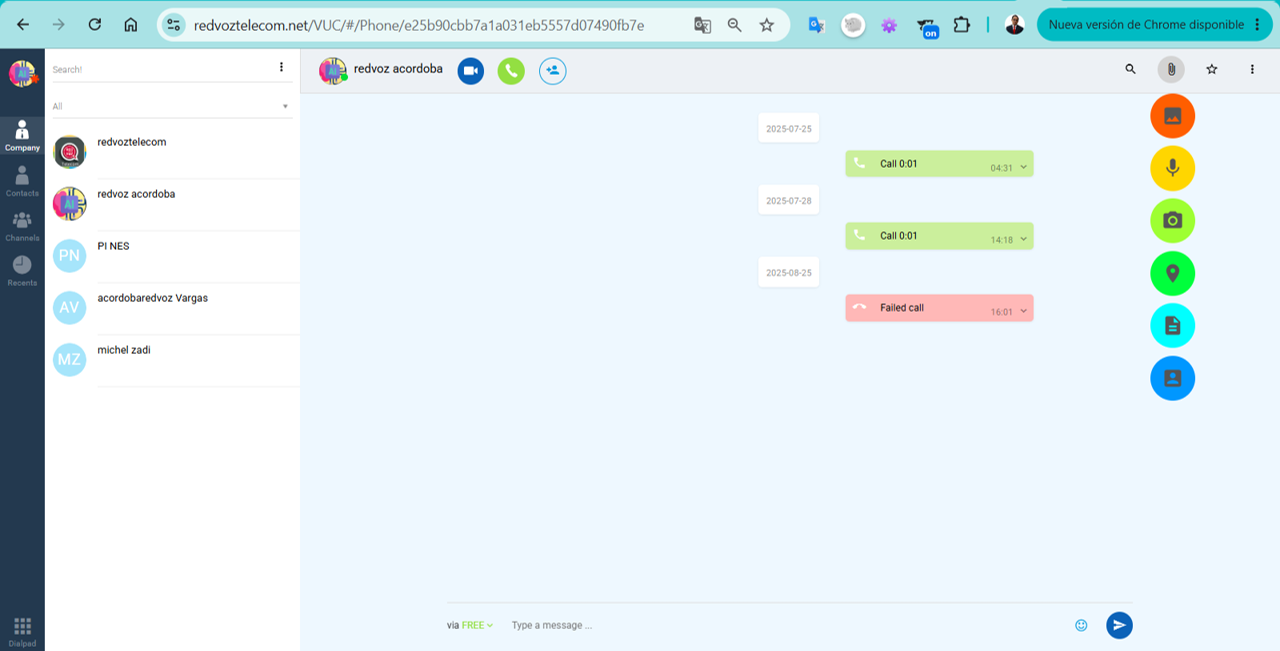
6Chat and calls inside the panel
Opening a contact opens a conversation where you see the history (calls made, missed and messages). From there you can:
Call 📞 or make a video call 🎥 with one click.
Write a message in the bar below (chat).
Attach image, audio, photo, location, file or a contact (the round menu on the right).
Chat and calls with a contact, with options to attach
Retail Client Guide — VUP Panel
Your personal calling account: profile, balance, contacts, forwarding and faxes.
Access: https://redvoztelecom.net/VUP
1Log in to the panel
Open redvoztelecom.net/VUP in your browser.
Enter your number/username and your password (we give them to you when your account is activated).
When you log in you'll see, top right, your available balance, the search box and the menu.
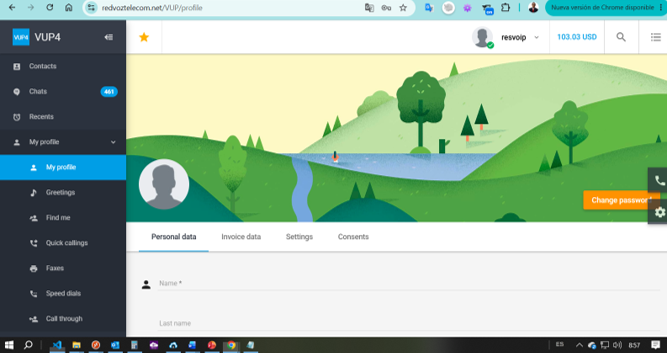
2My Profile
Here you manage your details. It has several tabs:
Personal data — Your first name, last name and contact.
Invoice data — The information that appears on your invoices.
Settings — Preferences (language, time zone, notifications).
Consents — Permissions and authorizations for your account.
Cambiar password (Change password) — Use it periodically for security.
My Profile in the Retail Client panel (VUP)
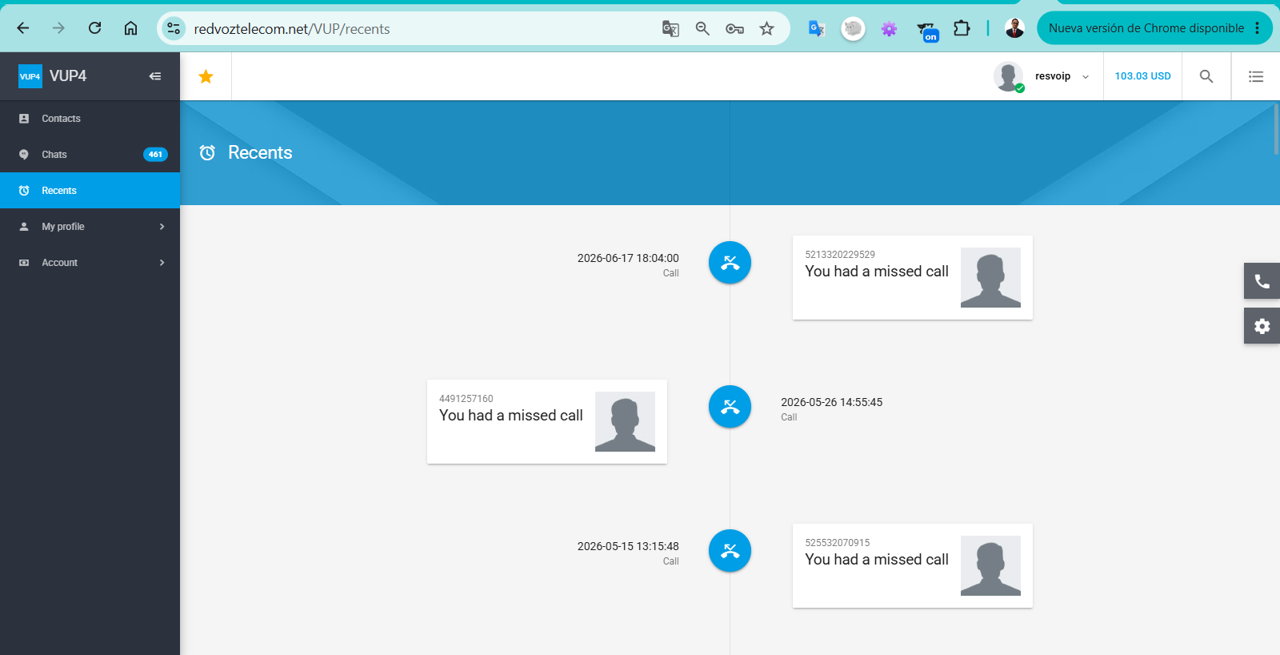
3Contacts, Chats and Recents
Contacts — Your personal address book: save names and numbers to call with one click.
Chats — Your account's built-in messaging.
Recents — The history of your calls (incoming, outgoing and missed) with date and duration. Missed ones are marked as "You had a missed call".
Recents — your call history
4Greetings, Find me and speed dial
Greetings — Record or upload the voice messages heard by those who call you (e.g. your voicemail greeting).
Find me — Have your calls follow you to several devices: cell phone, IP phone and softphone, at once or in order, so you don't miss calls.
Speed dials y Quick callings — Assign short numbers to your most frequent contacts.
5Faxes and Call through
Faxes — Send and receive digital faxes from the panel, with no physical machine.
Call through — Originate calls from the system to use your rates from any phone.
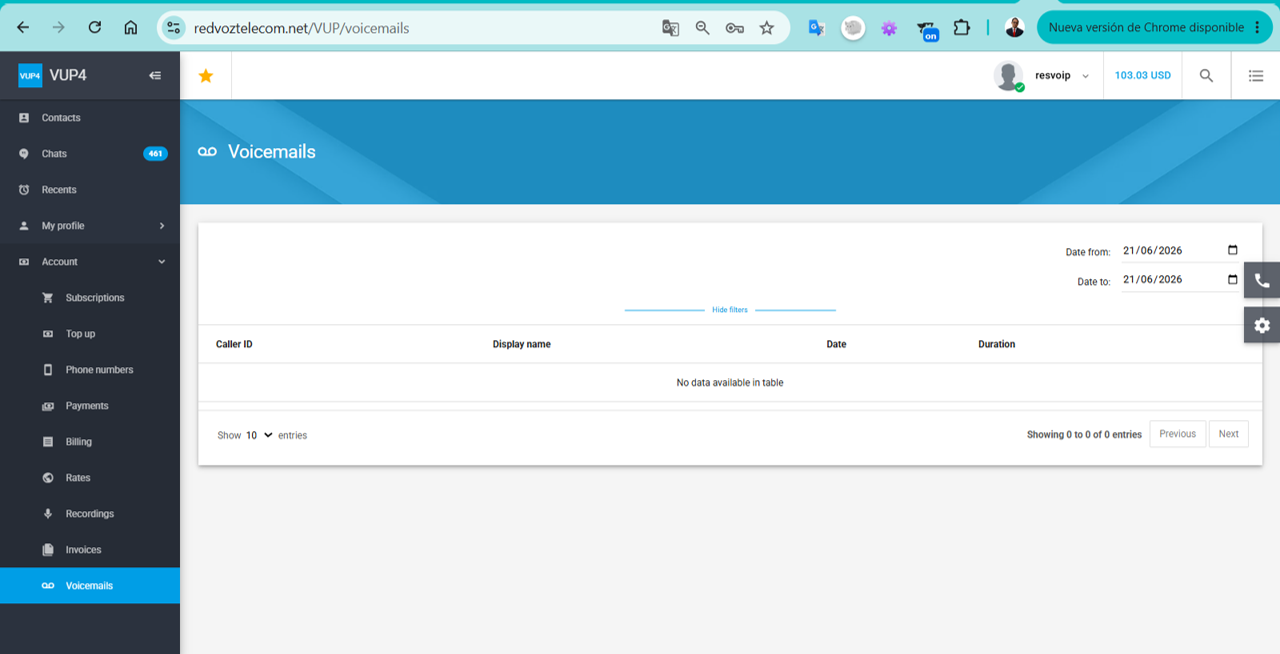
6Account: balance, top-ups, invoices and voicemails
Your balance in USD is always shown top right. In the Account menu you have everything for your account:
Top up — Add balance to keep calling.
Subscriptions — Your active plans.
Phone numbers — The numbers assigned to your account.
Payments / Invoices — Your payments and invoices to download.
Billing (Usage) — Breakdown of calls and expenses.
Rates — How much it costs to call each destination.
Recordings — Your recorded calls (if active).
Voicemails — Your voice messages; you can filter them by date (Date from / Date to).
Voicemails and the Account menu of the Retail panel
Your Retail account also gives you control of your calls:
Call report — In Recents you see the quick history (incoming, outgoing and missed), and in Account → Billing the full breakdown: date, destination, duration and cost of each call.
Call recording — In Account → Recordings you listen to and download your account's recorded calls (if you have the feature active).
Voicemails — In Voicemails you check the messages left for you, with a date filter.
Tip: want to enable call recording? Let us know and we'll turn it on for your account.
CallShop Guide (Booths)
For call shops/booths: control sales, sessions and rates of your clients' calls.
Access: https://redvoztelecom.net/Callshop/
1Log in
Go to redvoztelecom.net/Callshop/ with your operator. Top right you see your name, the Operators button and the Settings / About / Sign out.
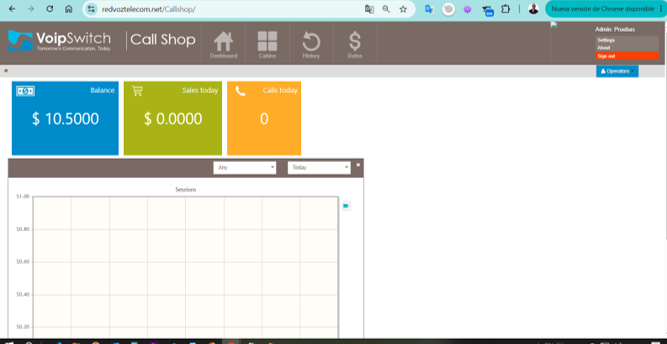
2Dashboard
As soon as you log in you see three big indicators for the day:
Balance — The booth's available balance (e.g. $10.50).
Sales today — How much you sold that day.
Calls today — How many calls were made.
Below, the Sessions (Sesiones) chart shows activity over time.
CallShop dashboard — balance, sales and calls of the day
3Main menu
Dashboard — The dashboard with the day's totals.
Cabins — Open/close each booth and see the ongoing call and its live cost.
History — All calls made, with duration and amount.
Rates — The per-destination price charged in the booths.
Typical flow: you open a booth → the client calls → on hang-up you see the cost → you charge → the sale is added to Sales today.
4Working with the Cabins
En Cabins you see each booth/phone in your shop. To serve a client:
Open the booth when the client is about to call (it stays active).
While they talk, you see the call live: destination, time and rising cost.
On hang-up, close the booth and the system shows you the total to charge.
You charge the client and that sale is recorded for the day.
Tip: always keep balance (Balance) in the booth; if it reaches zero, calls are cut off.
5History, rates and end of day
History — List of all calls with date, destination, duration and amount. It helps you balance the till at the end of the day and compare with what you collected.
Rates — Check how much each destination costs before the client calls, to charge correctly.
The day's totals (Sales today y Calls today) and the Sessions chart give you the quick summary on the dashboard.
Reseller Guide
For resellers: manage your own clients, their balances, rates and billing.
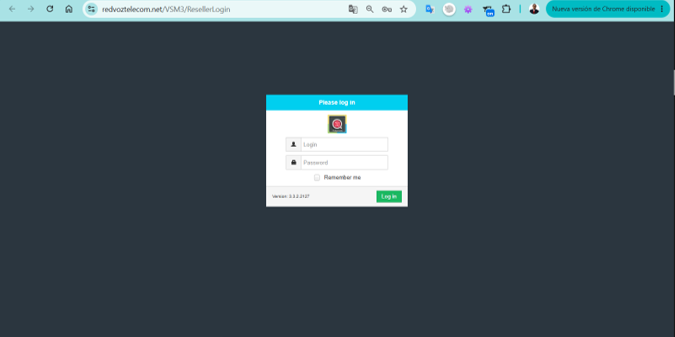
Go to redvoztelecom.net/VSM3/ResellerLogin, enter your Login y Password and tap Log in. You can check Remember me so you don't type it every time.
Reseller panel login (VSM3)
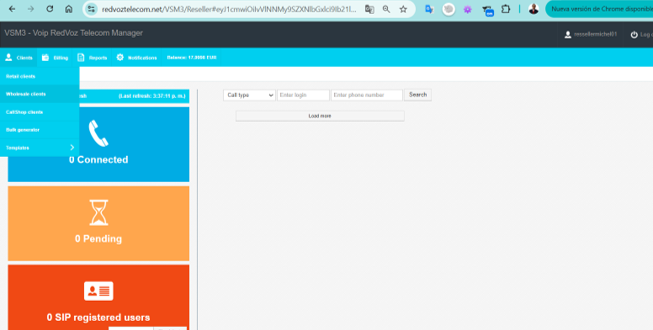
2Dashboard (VSM3 Manager)
When you log in you see your Balance (balance in EUR) at the top, the main menu and three live status cards:
Connected — Calls active right now.
Pending — Calls in progress.
SIP registered users — How many of your clients are registered (online).
You can search by call type, login or number to review activity.
Reseller dashboard — balance and live status
3Main menu
Clients — Your clients, divided into: Retail clients (end clients), Wholesale clients (wholesale), CallShop clients (booths), Bulk generator (create many accounts at once) and Templates (account templates).
Billing (Facturación) — Your clients' balances, rates and charges.
Reports — Traffic and usage statistics.
Notifications — System alerts.
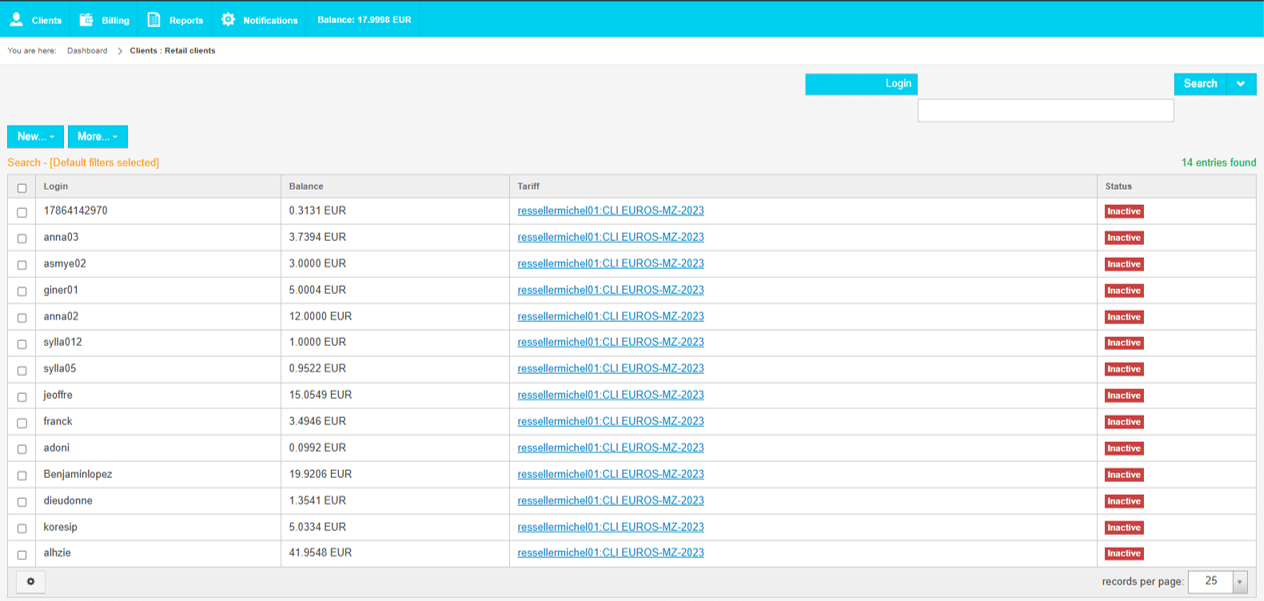
4Retail clients
En Clients → Retail clients you see the table of your end clients:
Column
What it is
Login
The client's login
Balance
Their current balance (in EUR)
Tariff
The price plan assigned to them
Status
Inactive / Active depending on whether the account is enabled
With New you create a client; with More y Search you filter and do bulk actions. Click a client to top up their balance, change their tariff o enable/disable the account.
Retail clients — login, balance, tariff and status
Tip: keep your clients Active and with balance; if one appears Inactive, check their balance or status so they can call again.
5Create a new client
Desde Clients → Retail clients → New you create a client. Typical data:
Login and password — With which the client logs in/registers their line.
Tariff — The price plan you charge them (e.g. EUROS-MZ-2023).
Initial balance (Balance) — The credit they start with.
Status — Leave it on Active so they can call.
Need many clients at once (for example to resell in bulk)? Use Bulk generator, which creates several accounts automatically, and Templates so they all come out with the same configuration.
6Client types
Retail clients — End clients who call with their account/softphone.
Wholesale clients — Other operators you sell traffic to wholesale (by trunk/IP).
CallShop clients — Call shops/booths you manage as CallShop accounts.
UC/PBX clients (Phone systems) — You can also create and manage PBX systems complete for your clients, each with its extensions, IVR and queues. They're created from the VSM (or from the UC panel) by choosing the parent company/account they belong to.
7Billing and reports
Billing (Facturación) — Your clients' balances, rates and charges; here you control how much they owe you and how much they used.
Reports — Statistics of traffic, minutes and earnings by client or by destination.
Balance (top) — Your own balance as a reseller; remember to keep it up so your clients don't run out of service.
Recordá: your reseller balance feeds all your clients. If it runs out, everyone's calls are cut off. Keep a margin.
8Resellers and sub-resellers (hierarchy)
The platform works in levels: the provider (RedVozTelecom) at the top, and below the resellers with up to two levels of sub-resellers. That is, a reseller can have other resellers below them, and those in turn their own end clients.
Everyone sees only their own — When you log in to the VSM you manage only your clients and your sub-resellers; you don't see those of other branches.
Balance flows down in cascade — The "upper" reseller's credit feeds those below. If you're the top reseller, your balance sustains your sub-resellers and their clients; if it runs out, your whole branch is affected.
Same tools, limited scope — Each sub-reseller has their own panel with the same features (clients, rates, billing), but only over their accounts.
In practice: you build your distribution network — you as the top reseller, and below your sub-resellers selling to end clients, each with their balance, rates and login.
Calling Cards Guide (PIN cards)
Prepaid calling cards: the client dials an access number, enters their PIN and talks.
1What is a Calling Card?
A calling card is a prepaid credit with a PIN. The client needs no line or app: they just call an access number, enters their PIN and can then dial any destination, deducting from the card's balance.
2How the client uses it (step by step)
Dials the access number that comes on the card.
The system asks for the PIN → they enter it.
Hears their available balance.
Dials the destination number (with country code) and talks.
The cost is deducted from the card's balance until it runs out.
Client dials access → "Enter your PIN" → PIN
→ "Your balance is X" → dials destination → talks
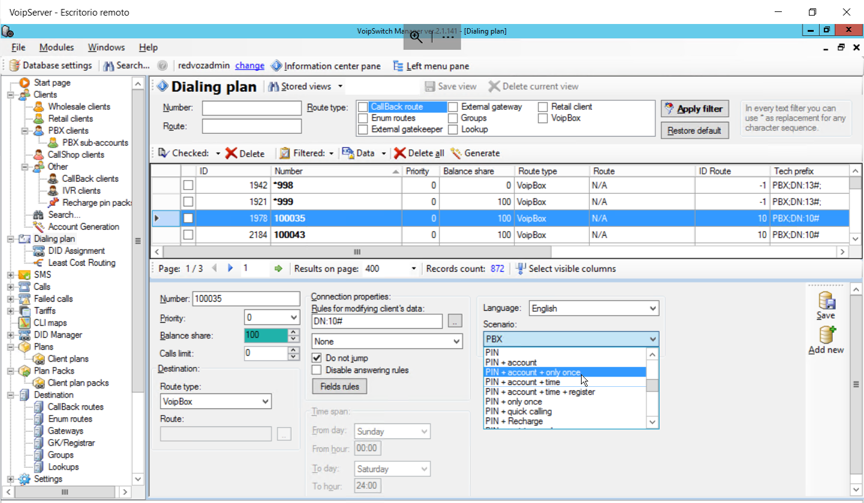
3Available scenarios (for the administrator)
On the server (VoipSwitch), each card plan uses a scenario that defines what the system asks on entry:
PIN — Only asks for the PIN and lets you call (the simplest).
PIN + account — PIN associated with a client account.
PIN + account + register — Also registers/identifies the number they call from.
PIN + recharge — Allows recharging the card's balance with another code.
El dialing plan decides where each call goes out (the routes), and the language of the prompts (e.g. Spanish/English).
VoipSwitch server — dialing plan and card PIN scenarios
4Generate cards (Pin Packs)
Cards are created in batches from Pin Packs:
Calling cards — Generates a group of PINs with a defined balance value.
Scratch cards — Hidden PINs to print/hand out.
Each batch is ready to sell; when used, the balance deducts automatically.
Note: this section is in the server administration panel. If you sell cards and need a new batch or to adjust a scenario, write to us and we'll set it up.
Frequently Asked Questions
The most common questions and how to solve them fast.
🔑 I forgot my password, how do I recover it?
In the PBX (UC) panel tap "Forgot your password?" on the login screen and follow the steps by email. In Retail (VUP) or if the email doesn't arrive, write to us and we'll reset it for you.
📵 My softphone (Zoiper/MicroSIP) won't register, I have no line
Check three things: username, password SIP y server — they must be exact. Also check your internet. When the app shows the green dot, you're registered. If there's still no line, contact us with your extension name.
📱 Can I use my extension on my phone?
Yes. Install Zoiper o MizuPhone on your phone, ask us for your SIP details and register your extension. That way you call and receive on your phone with your number, anywhere with internet. More info at app-para-llamadas.
💳 How do I top up my balance?
En Retail (VUP) go to Account → Top up. In the PBX, from Settings → Account. Or top up directly online here: Top up calling balance. Questions or want to pay another way? Contact us.
📨 How do I get voicemails to reach my email?
In the PBX, go to My profile and enable "Voicemail to email". From then on, every voicemail left for you also reaches your email.
🎙️ How do I record my company's welcome greeting?
En Settings → Greetings use RECORD (record with your microphone), TEXT TO SPEECH (type the text and have a voice read it) or UPLOAD (upload an mp3). Then you assign that greeting to your IVR or voicemail.
📞 An incoming call doesn't land on the menu (IVR), what do I check?
Check that the number is pointing to the correct Autoattendant and that the greeting is assigned. If you want a different message after hours, set up the "out of service" scenario. If it gets tricky, we'll look at it together.
🧾 Where do I see my invoices and usage?
In Retail: Account → Invoices / Billing. In PBX: Settings → Billing / Payments. There you'll find the breakdown of calls, SMS and the documents to download.
🟥 I'm a Reseller and a client shows "Inactive"
It's almost always due to zero balance or because the account is disabled. Go to Clients → Retail clients, open that client, top up their balance or change their status to Active.
🏪 In the CallShop, how do I charge for a call?
You open the booth, the client calls, and on hang-up the system shows you the total cost. You charge that amount and the sale is added to Sales today. In History you see everything to balance the till.
🔢 What is an extension and what is it for?
It's the internal number of each person within your phone system (e.g. 100, 101). You dial that short number to talk to a coworker without spending balance, and your calls come in through it.
🌐 Do I need internet to use my line?
Yes. Your phone or softphone connects via internet (it's VoIP). With a stable connection you can call and receive from anywhere in the world, as if you were in your office.
📞 Can I have several people on the same phone system?
Sure. Each employee has their own extension, and you set up queues y ring groups to distribute calls among your team. All from Settings → Usuarios.
🔀 How do I forward my calls to another number or cell?
With the Find me feature in your panel. You set your calls to ring on your cell, IP phone and softphone — at once or in order — so you don't miss any.
🎧 Can I listen to my recorded calls?
Yes, if recording is active. In the PBX they're in Settings → Call recordings and in Retail in Account → Recordings. Want to enable it? Escribinos.
💬 How do I request support?
Desde Contact support or your Client Area. We're here to help you with your phone system, your account or your cards.
Telecom glossary
The terms you'll see in the panels, explained simply.
Term
What it means
Extension
The internal number of each person within your phone system (e.g. 101). You dial that number to talk to a coworker.
SIP
The "language" internet phones use to register and call. Your SIP details = username, password and server.
Softphone
An app (Zoiper, MizuPhone, MicroSIP) that turns your cell or PC into a phone.
IP Phone
A physical phone that connects via internet instead of the traditional line.
DID
A public (direct) phone number people dial to reach your phone system or extension.
SIP Trunk
The "pipe" through which many calls come in and out at once between your phone system and the phone network.
IVR / Auto-attendant
The auto-attendant: "Press 1 for Sales, 2 for Support…".
Queue
Puts calls on hold and distributes them among several agents in order.
Ring group
Several phones ring at once; the first to answer takes it.
Voicemail
The message a caller leaves when you don't answer; you can receive it in your email.
Caller ID
The number you show when you call (your identifier).
CDR
The record of each call: date, duration, destination and cost.
Tariff
The price charged for calling each destination.
Balance
The credit available to call; when it reaches zero, calls are cut off.
Calling Card (PIN)
Prepaid card: you dial an access number, enter a PIN and call.
CallShop / Booth
A shop or station where a client makes calls and pays when finished.
Reseller
Reseller: manages their own clients, balances and rates on the platform.
No results found for your search. Try another word (e.g. "extension", "IVR", "balance", "booth", "client", "PIN").